 Millworker
 Place Hole
Holes of a hole type in a panel, on a sketch's points or measured from two edges, previewed as they will be cut.
- A part with the panel as a body.
- For On sketch points: a sketch with a point where each hole goes.
- Click Place Hole (Fasteners panel).
- Choose the hole type in the mini toolbar's list (each with its category's icon). Edit holes… opens Hole Types to make or change one; the list is read again when it closes.
- Choose how the holes are placed: On sketch points or From edges.
- Pick (below). The holes are previewed as they will be cut: the head, the hole, its depth and drill point.
- Apply or OK.
On sketch points
Pick a sketch: a hole goes on each of its own points (projected points and circle centres are left out). Or pick its points one by one. The holes follow the sketch when it changes. When the holes are made, the sketch is turned off (it is still there and still drives the holes; Visibility in the browser shows it again).
From edges
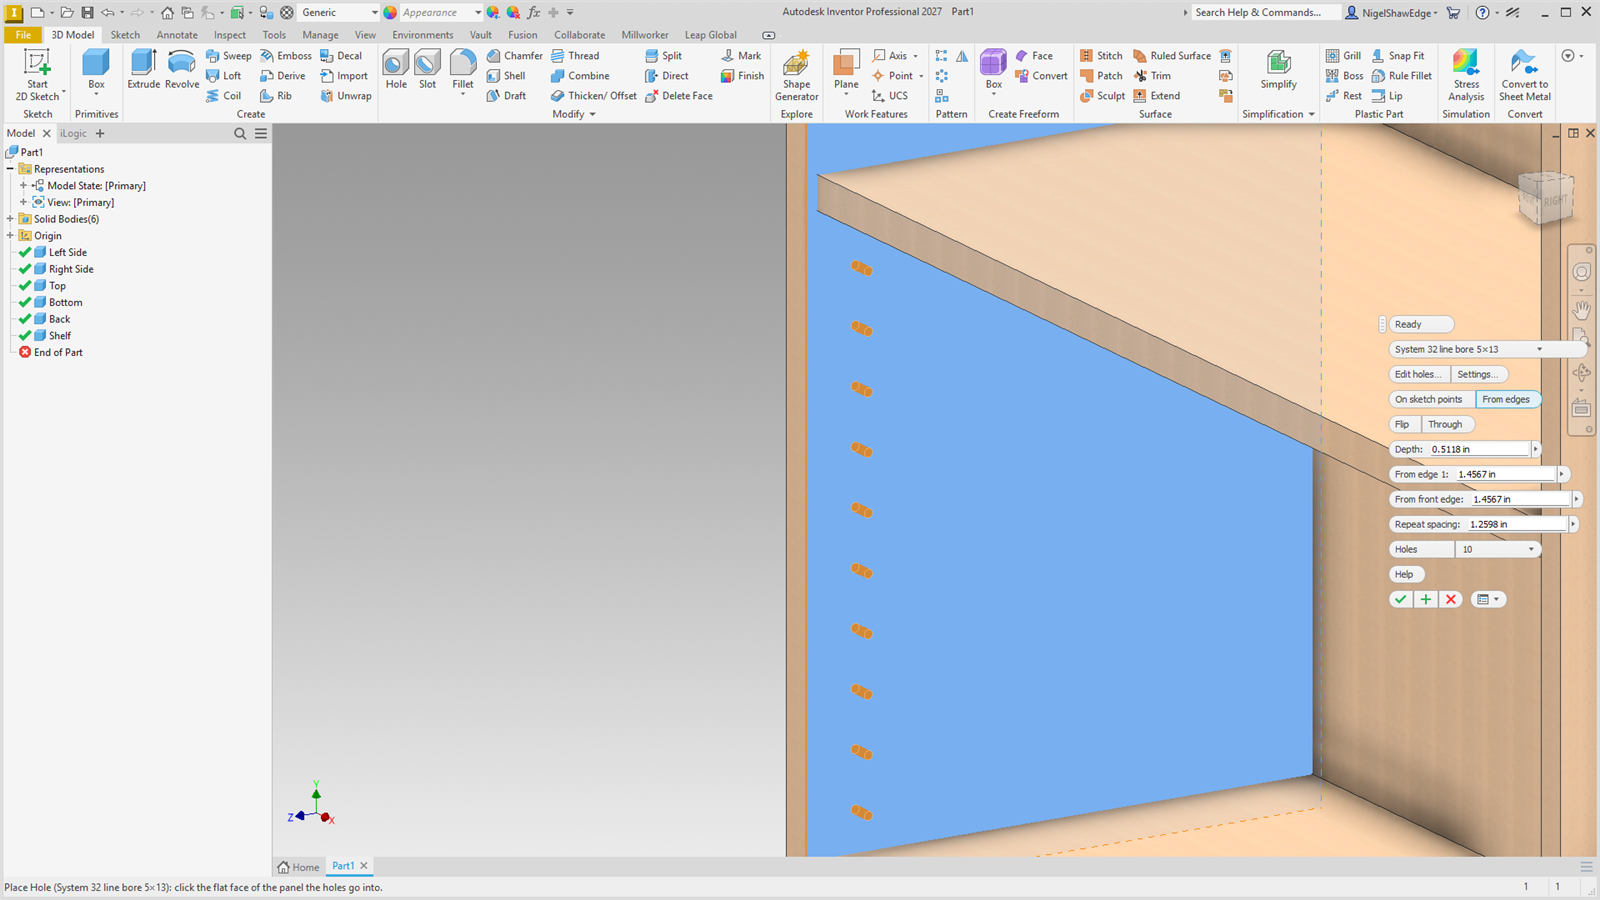
Pick the flat face the holes go into, then the edge (or edges) they are measured from. Holes is how many. How the row is spaced follows the hole type's category:
| Confirmats and wood screws | Pick the face and one edge. The first and last holes are From the ends in from each end of that edge (50 mm to start), and the holes between are spread evenly; one hole goes in the middle. On a panel's face (a back screwed into the bottom's edge, say) pick the face and the edge line: the holes are From the line up from it (9 mm to start, half an 18 mm panel), a dimension you can change. On a panel's edge (a narrow face), Centre (on to start) puts the holes in the middle of its thickness instead; turn it off to use From the line there too. The edge's length is a parameter (MW_PlaceHole1_EdgeLength), so when the panel gets longer or shorter the holes spread out again. |
| Dowels | Pick the face, the edge the row runs along, then the front edge. The first dowel is From front edge back from it and From edge 1 across; the rest follow back from the front, Dowel spacing apart, in the dowel machine's 32 mm steps (32, 64, 96, 128…). |
| Shelf holes and the rest | As dowels, from the front edge, with Repeat spacing typed (32 mm to start: System 32). |
A row that is too long for the panel just stops at the last hole that fits: the rest are left out and the status bar says how many. Settings… sets the distances a new placement starts with.
The hole
| Flip | Drill from the other side: from edges, from the panel's opposite face (the head goes there); on sketch points, the other way from the sketch. |
| Through | Through the panel, else blind to the depth. Starts as the hole type is. |
| Depth | How deep a blind hole goes. Starts as the hole type's depth; change it for these holes only. |
Every size and distance is a parameter (MW_PlaceHole1_…) in the Millworker group. Each hole is tagged with its hole type and the hole type's fastener, so Insert Fastener and Place Hardware find it. Double-click the node to open the tool again.